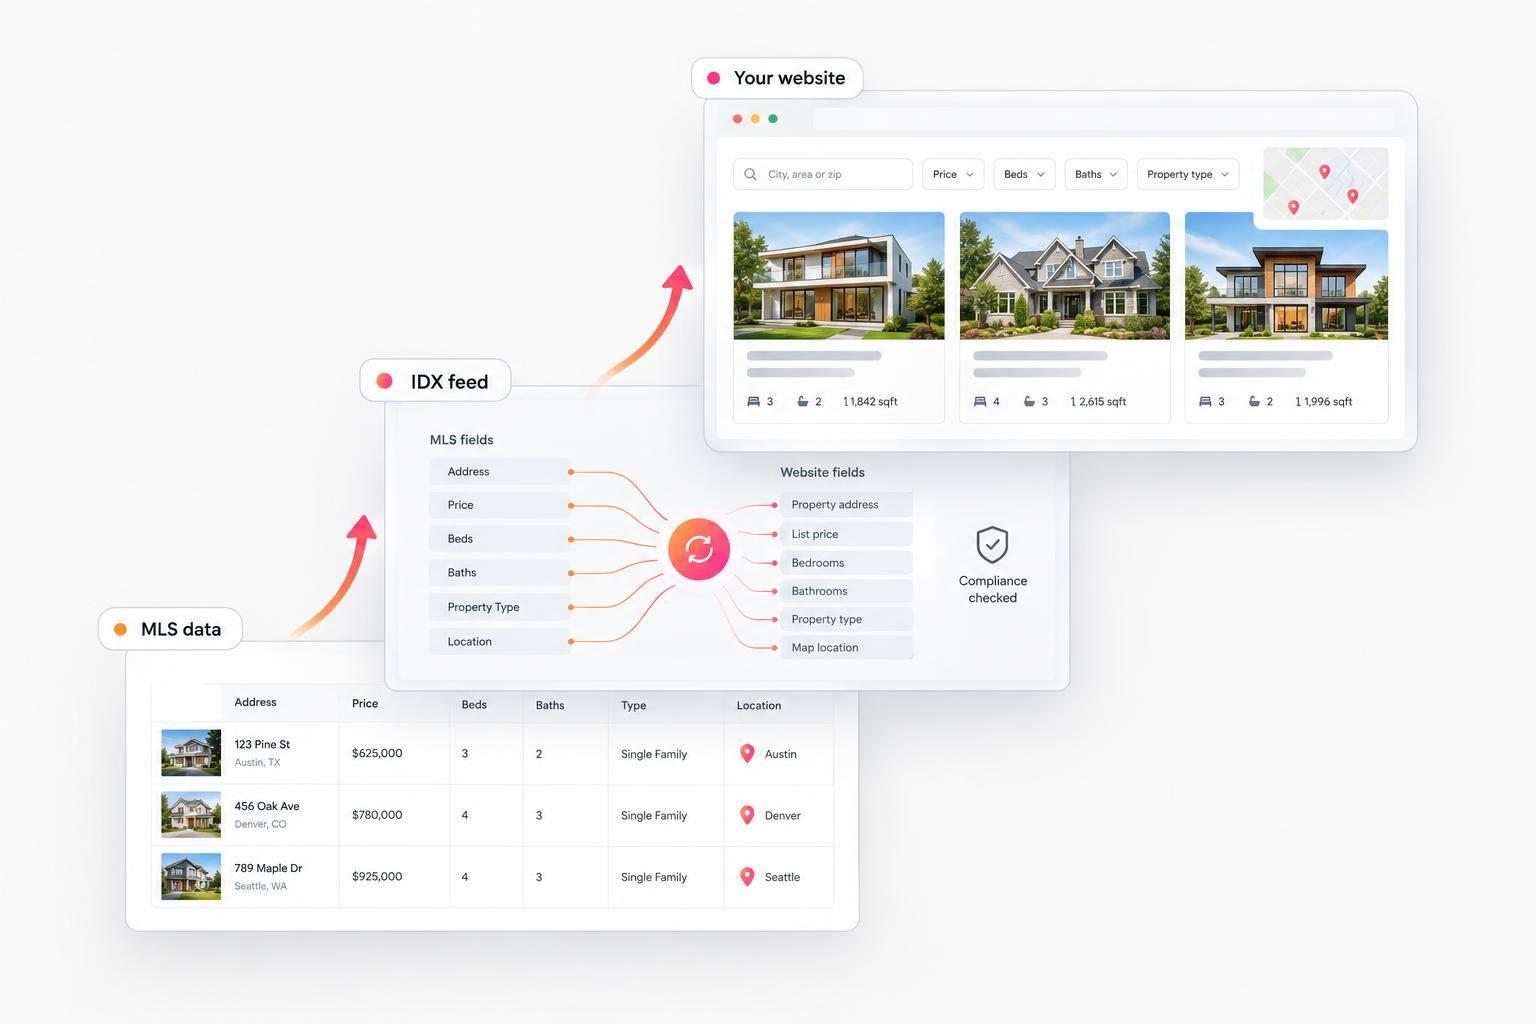
An IDX feed brings MLS-approved listings to your website - but I start with broker and MLS approval, not the website code. Once approved, the connection supplies listing data for property search, maps, photos, and listing pages.
I use four steps to get from approval to launch:
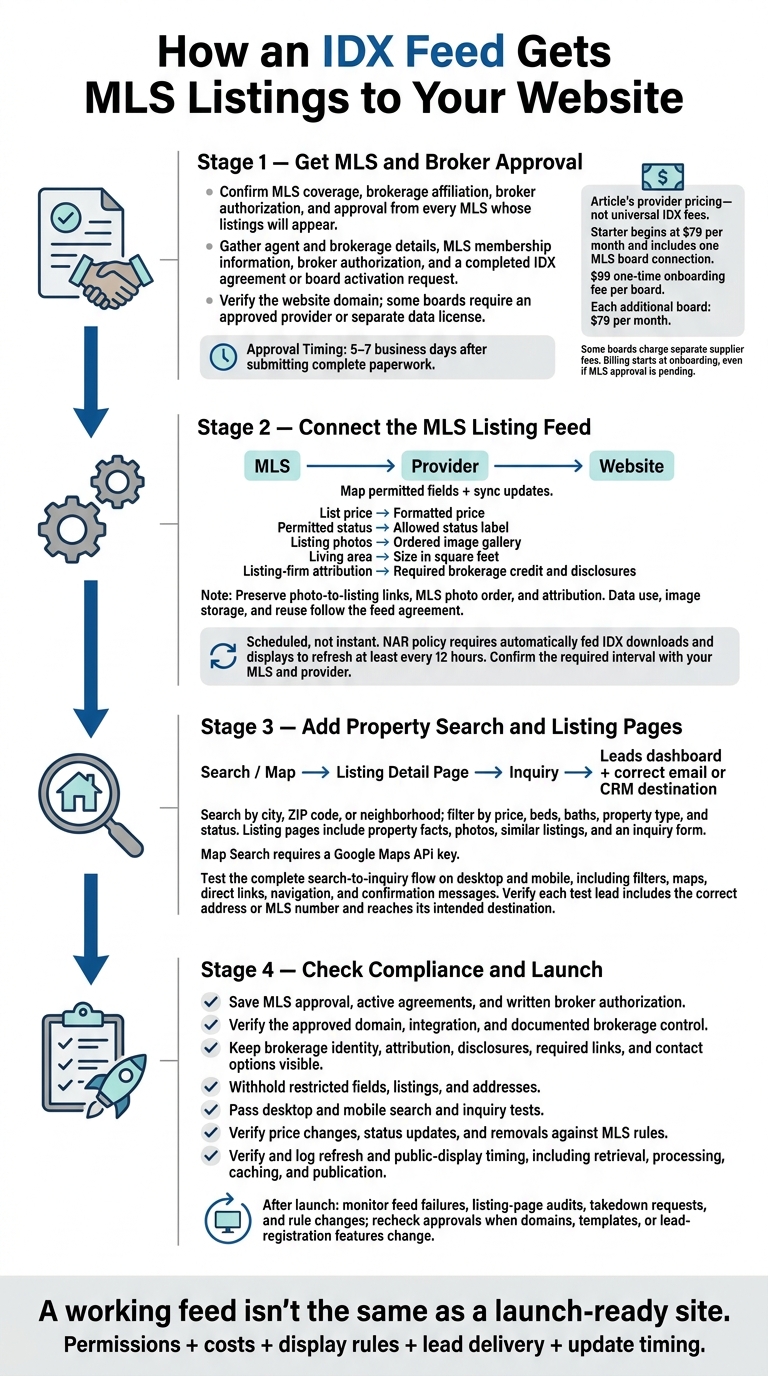
- Get access: Confirm MLS coverage, broker permission, fees, and domain approval. Allow about 5–7 business days after submitting complete paperwork.
- Connect the data: Map permitted fields and check how price, photo, and status changes reach the site.
- Build and test: Add search and listing pages, then test the path from browsing to submitting an inquiry on desktop and mobile.
- Check the rules: Verify brokerage credits, disclosures, private-data exclusions, and update timing before launch - and monitor them afterward.
My rule: <u>a working feed isn’t the same as a launch-ready site</u>. I check permissions, costs, display rules, and lead delivery - not just whether listings appear. And I treat updates as scheduled, not instant.
How an IDX Feed Gets MLS Listings to Your Website
Step 1: Get MLS and Broker Approval
An IDX subscription alone doesn’t give you MLS access. You also need brokerage affiliation, broker authorization, and approval from every MLS whose listings you want to display. That approval lets you use the feed on your website.
Complete the Access Requirements
Before you apply, gather your agent and brokerage details, MLS membership information, broker authorization, and a completed IDX agreement or board activation request. Some MLS boards also require an approved provider or a separate data license. Add your website domain under Settings > Sites so it can be verified for IDX display.
Approval usually takes 5–7 business days after you submit all required information and documents. Check the MLS Boards dashboard for requests for more information. While you wait, prepare your pages and widget layouts.
Check MLS Coverage and Costs
Select your primary board during checkout, then request any additional connections through MLS Boards. Starter begins at $79 per month and includes one MLS board connection. Each board has a $99 one-time onboarding fee, and each additional board costs $79 per month.
Some boards may charge separate supplier fees, so check the board’s billing schedule before confirming your connection. Billing starts at onboarding, even if MLS approval is still pending.
Once the board approves access, connect the feed to your website.
Step 2: Connect the MLS Listing Feed
Once you have approval, the feed carries MLS data through the provider to your website. This connection may use an API, a server-to-server feed, or another MLS-approved method.
Prepare Listing Data for Website Display
The provider then maps permitted MLS fields into formats your website can display. The feed agreement governs how you can use that data.
| MLS field | Website display | Visitor experience |
|---|---|---|
| List price | Formatted price | Compare prices and filter results |
| Permitted status | Allowed status label | Check listing status |
| Listing photos | Ordered image gallery | Browse property images |
| Living area | Size in square feet | Compare property sizes |
| Listing-firm attribution | Required brokerage credit and disclosures | Identify the listing source |
Keep photos linked to the correct listing, with the MLS order and attribution intact. Providers may resize images to help pages load faster, but image storage and reuse must follow the feed agreement.
How Listing Changes Reach Your Site
After mapping, the data needs to sync. Updates travel from the MLS to the provider, then to your website. Price changes, description edits, and photo updates won't appear instantly - each step takes time to sync.
That timing affects what visitors see in search results and on property pages. Permitted status changes may update a property's label or remove it from active results. Local rules determine whether sold and off-market listings can appear.
NAR policy requires automatically fed IDX downloads and displays to refresh at least every 12 hours. Confirm the required sync interval with your MLS and provider. If an update is missing, compare the MLS record with your website and refresh the cache.
Step 3: Add Property Search and Listing Pages
Once the feed is connected and syncing, turn the MLS data into pages visitors can search and browse.
Set Up Search, Maps, and Listing Details
Set up Full IDX Search so visitors can search by city, ZIP code, or neighborhood and filter by price, beds, baths, property type, and status. Link results to a live Listing Detail Page with property facts, photos, similar listings, and an inquiry form. Set each widget’s Listing Detail Page URL to that live page on your site.
For map-based browsing, add Map Search with a Google Maps API key. Enable listing pins, clusters, draw-to-search, and results that update as visitors move the map. Use Full IDX Search as the main search tool, with grids, carousels, or MLS-number links in secondary placements.
Embed and Test Your IDX Display
With the search setup planned, add the approved display to your site.
Place the approved script in your site’s code or embed block, then match your brokerage’s colors and typography. Keep required attribution and disclosures visible.
Test the full search-to-inquiry flow on desktop and mobile. Check search, filters, pagination, map pins, clusters, draw-to-search, listing pages, direct links, page reloads, and the back button. If no results appear, loosen the filters before assuming the embed is broken, or compare IDX alternatives to see how different platforms handle data.
Submit a test inquiry. Confirm it appears in the EasyAgentIDX Leads dashboard and reaches the correct email or CRM destination. Check that the lead includes the correct address or MLS number and that visitors see a clear confirmation message. Make sure brokerage identity, attribution, and disclosures stay readable on every screen.
Before launch, verify the display rules and update timing.
Step 4: Check Compliance and Launch
Once the feed, search tools, and listing pages are live, run a final compliance check before opening the site to the public.
Verify Display Rules and Update Timing
Confirm that the live site matches the approved domain, brokerage authorization, and IDX integration. Store approval records and brokerage agreements together. The public display must identify the brokerage as the responsible party.
Review local MLS rules, state law, and broker instructions. Check attribution, disclaimers, required links, status labels, and a consumer contact method. Also review rules for photos, sold or off-market listings, third-party domains, lead registration, withheld addresses, and seller opt-outs. Audit field mappings and page source for restricted data.
Make sure the site’s refresh schedule meets the required update window for permitted active, pending, sold, and removed listings. Meeting that window does not guarantee instant updates. Log retrieval, processing, caching, and publish times. Then test a price or status change from the feed through to the live page.
Final Launch Checklist
- [ ] Save MLS approval, active agreements, and written broker authorization.
- [ ] Verify the approved domain, integration, and documented brokerage control.
- [ ] Confirm that brokerage identity, attribution, disclosures, links, and contact options are visible.
- [ ] Make sure restricted fields, listings, and addresses are withheld.
- [ ] Confirm that search and inquiry tests pass on desktop and mobile.
- [ ] Check price changes, status updates, and removals against MLS rules.
- [ ] Verify and log refresh and public-display timing.
After launch, continue monitoring approvals, takedown requests, and rule changes. Assign responsibility for feed-failure alerts, listing-page audits, takedown requests, and rule changes. Recheck approvals whenever domains, templates, or lead-registration features change.
FAQs
Can I choose which IDX listings appear on my site?
Yes. You can choose which listings appear by setting filters in your IDX widgets. When creating a Full IDX Search, Listings Grid, or Listings Carousel, select your MLS feed and set filters for location, property type, price range, and status. Each widget shows only listings that match your criteria.
All displayed listings must follow your MLS board’s display rules and status requirements.
Can IDX listing pages appear in Google search results?
Yes, IDX listing pages can appear in Google search results. Embedding IDX widgets directly into your site’s pages can make listing content searchable and indexable, provided search engines can read it. It also keeps visitors on your domain instead of sending them to a third-party portal.
Make sure your listing detail pages are properly published and integrated into your site so search engines can find them.
What happens to my IDX feed if I change brokerages?
When you change brokerages, update your professional information with your MLS board. Your IDX feed access depends on your license and your brokerage’s approval.
Manage your application in the MLS Boards section of your EasyAgentIDX dashboard to meet your new board or office requirements. Keep your authorization valid so your listings stay active and you retain feed access.